Instructions For Using Your Maxx Counterflow Wort Chiller
Thank you for purchasing the Exchilerator™ Counterflow Wort Chiller!
Your Exchilerator can be used in any position and comes packaged with loose fittings so that you can mount and configure your brewery any way you see fit. It is recommended to flush the Exchilerator prior to its first use with boiling water. This is also a great time to connect the chilling water and try it out. This will give the unit a rinse and provide you with a feel of what to expect when using it on your brew day.
Hose and fitting arrangements
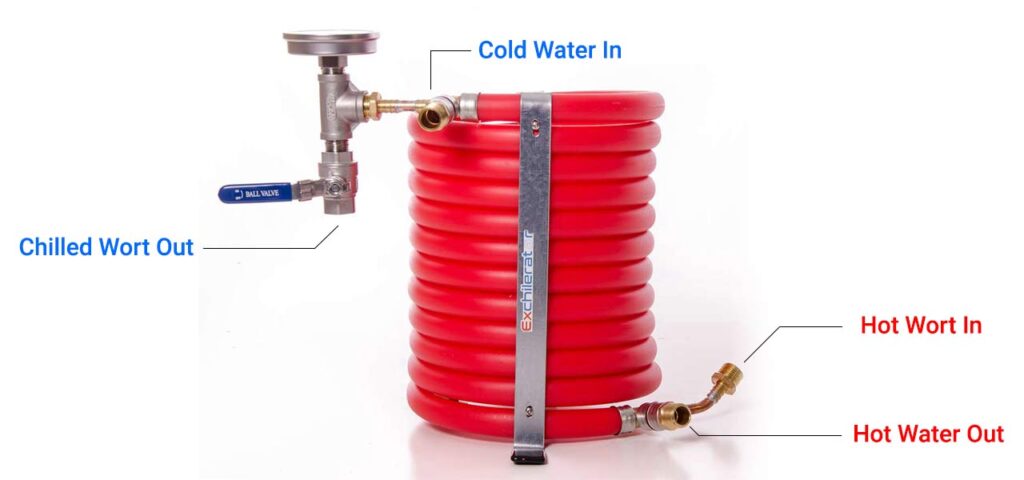
The Exchilerator has two ends, a cold end and a hot end. Each end has a wort and water connection. The hot end is where the boiling wort enters into the unit and the cold end is where it exits after being chilled. Always make sure to connect the water ends opposite of the wort ends.
The Ends can be reversed if you choose, this is just our example.
The cold water input should be connected on the cold end so it will flow in the opposite direction of the hot wort. The hot end is where your hot wort will enter the 3/8 copper and your warm waste water will exit thru PEX tubing via a male hose adapter.
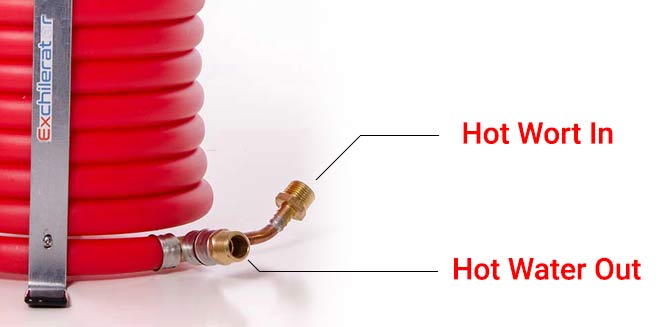
The Hot wort will travel through the 3/8 copper tubing in one direction while the chilling water passes around the outside of copper tube in the opposite direction inside the 3/4 PEX tubing. This “counterflow” process is what pulls the thermal energy from your wort to produce real time pitch temps at the cooling end for your wort.
The cold end is where you will thread the temp/gauge manifold to the 3/8 x 1/2 copper fitting.
- Caution – when tightening the soldered fittings always use the Teflon tape on threads and back up with a 7/8 wrench or you will twist fitting causing a leak. Many times when Teflon tape is used, it is best to hand tighten as a snug fit will work perfectly.
3. Temperature Control
-= CAUTION DANGER CAUTION=-
Water temperature 125F and up can cause severe burns instantly.
There are several ways to control the temperature of the out flowing wort on from your exchilerator.
- you can increase the volume or flow of the chilling water for more cooling.
- You can decrease the volume or flow of the chilling water for less cooling and to raise the wort temperature.
- You can use the ball valve from your kettle, or on the unit to raise or lower the out flowing wort temperatures:
- More flow will have less of a cooling effect.
- Less flow will increase the cooling effect.
4. Cleaning & Care
After brewing, flush the exchilerator with hot water and drain. Another option would be to fill and soak the unit with EBW ( Exchilerator Brewery Wash) for about 15 minutes and flush again with hot water.
It is best not to store your Exchilerator wet for long periods of time. If your unit is not mounted, try rolling it on its side in one direction until the water is fully drained (about 10 times). If your unit is mounted to your brewery, you can try to blow it out with Co2 or use the suction side of a wet vacuum to remove any rinse liquid. These are our suggestions, you very well may find your own routine that better suits your needs.
5. Questions
Before contacting us, please view our YouTube channel for detailed walk through instructions of using our unit.
YouTube: https://www.youtube.com/channel/UCIXFgzDT_A94rYABteXVJhw
For any other questions or concerns, please email us at contact@exchilerator.com .